
 English
 España
Let's learn about the installation, classification and cleaning skills of the washbasin drainer together!
1. Press-type dehydrator. Although the appearance of the push-type drain is beautiful, the push-type drain is more likely to adhere to some dirt, the operation is slightly complicated, and it is inconvenient to use.
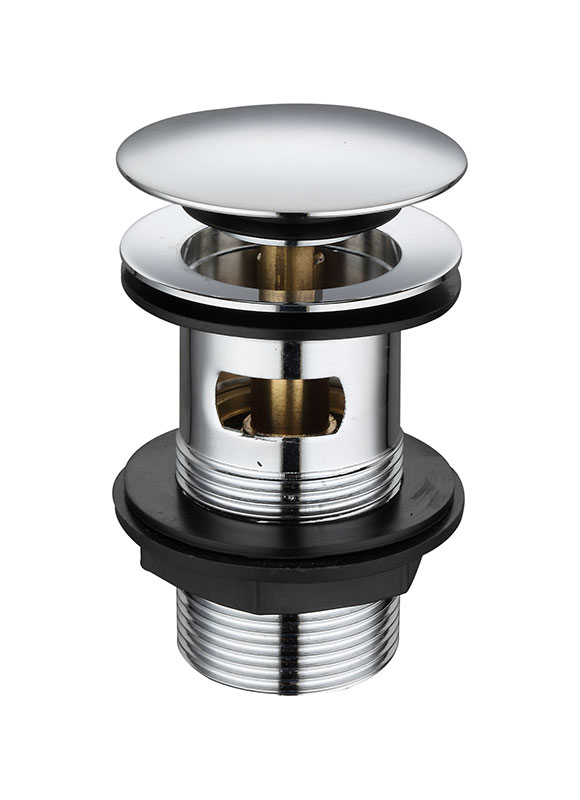
2. Flip dehydrator. The flap drain can be rotated in any direction at will. After a long time of use, the airtightness of the flap drain will decrease, resulting in the basin not being able to be filled with water. Or the situation cannot be turned over; the present invention has a simple structure, is easy to clean, and is convenient to replace.
3. Leak traps. The structure of installing a leaky drain pipe in a washbasin drainer is also relatively simple, similar to the structure of a kitchen sink. The disassembly and assembly procedures for leaking drains are slightly more complicated than those for press and flap drains. The basin of a leaking sewer will not hold water unless it is covered with a sealing cap.
Basin drain installation steps:
1. First take out the purchased drain, remove the fixing part and flange at the lower end of the basin drain, and then fasten the flange of the water pipe under the basin under the basin. Be sure to tighten the flange. Once tightened, the pot can be placed on the table top, aligning one end of the pot drain pipe with the hole where the pot will be placed.
2. Stick some tape to prevent water seepage on the appropriate position of the basin sewer pipe, then align the other end of the basin sewer pipe with the sewer, that is, the hole of the sewer pipe, adjust it, and take out the accessories or parts of the basin sewer pipe, Use a wrench to tighten the connection between the sewer pipe and the sewer pipe. After installation, check whether both ends of the water pipe under the basin are evenly adjusted and tightened.
3. Check for repaired parts or flat parts during installation. After checking that it is correct, start to test the water resistance in the basin, and reflect whether there is water leakage from the side. If there is no water leakage or seepage, the basin sewer pipe is installed; on the contrary, it needs to be checked again or reinstalled.


